I often get asked how I pack our Lovable Lunches.
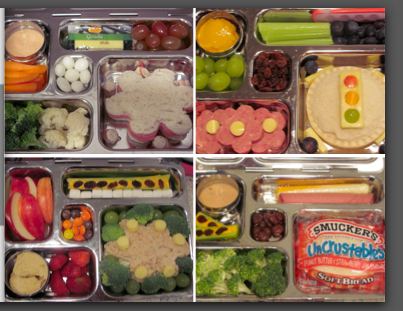
Lets start out by showing you our Lovable Lunches from the past week.
My favorite one of the 4 below is the one with the stop light.
To make the stop light I used a small round cookie cutter and made 3 holes in a piece of cheese. Then I used the same cutter to cut out a piece of apple for the red light, a piece of cheddar cheese for the yellow light and a piece of green grape for the green light.
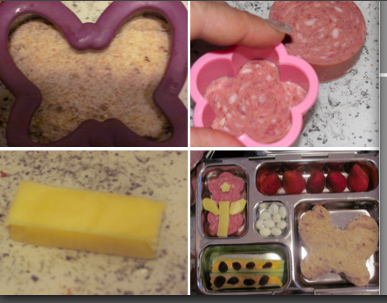
I use cookie or sandwich cutters for my Lovable Lunches.
I usually find the best deals at a second hand store or at the bulk barn. You can also purchase cutters at Michaels, although they tend to cost a bit more there. I prefer the metal cutters for sandwiches (like the purple butterfly below), but find plastic are good enough for meat or cheese etc.
It is always a good idea to buy cutters after a holiday as you can get them for 50 – 75% off!
I sometimes try to do a theme to match a unit my daughter has in school. I usually use Google to find ideas and then just modify it to what I have on hand.
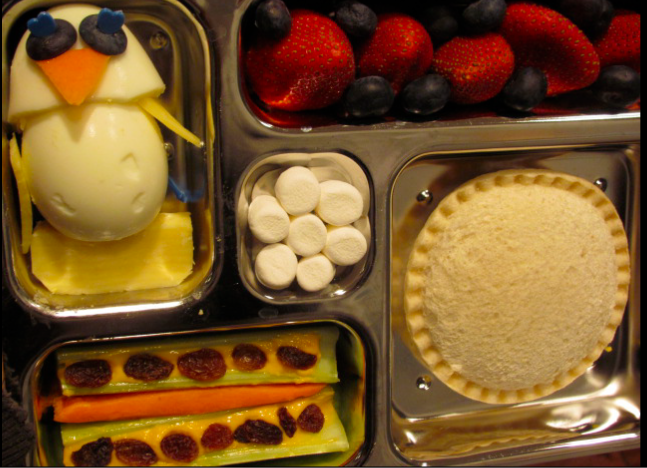
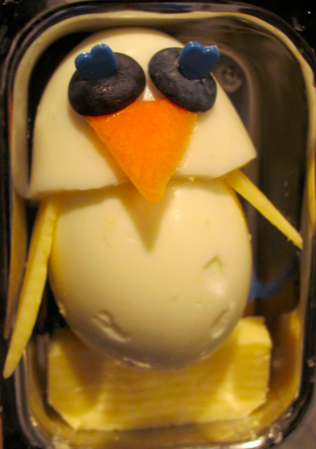
The Lovable Lunch below was meant to be an owl, but turned out to look more like a penguin…I don’t worry too much, my daughter sure doesn’t mind!
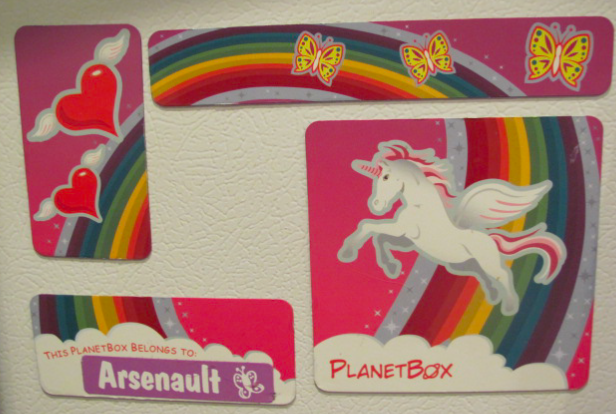
My most asked question is about what is that container you pack your Lovable Lunches in. You can read about the containers here and here.
I love the options to change the magnets on our planet box.
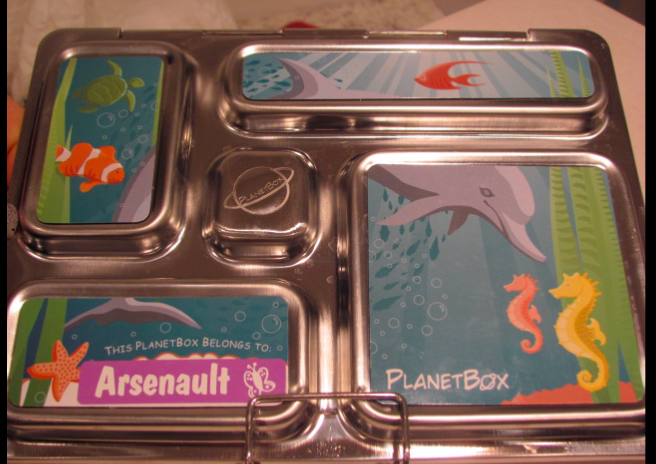
We just keep the extra set on the fridge!
From idea to completion packing a Lovable Lunch for my daughter takes about 10-25 minutes. It does not always have to be creative, just using a variety of colors makes the lunch more appealing!
Have fun packing lunches! It is a great way to make healthier eating FUN.
Grab our Lovable Lunches Button!

PlanetBox Makes Taking Your Lunch Fun and Green!
Tuesday 15th of November 2011
[...] and everyday she photographs the lunch and shares it with her readers. Here’s a post on how she makes them as well as links to some of her fun creations. Don’t worry if you aren’t as creative [...]
Connie
Friday 9th of September 2011
Oh, for a full "crustable" use two the same size....and slightly roll the bread first so it's thinner. Then press the two molds together to seal.
Connie
Friday 9th of September 2011
Make & freeze your own uncrustables - use mini pie molds...I forgot what they're called. They make a half a sandwich - cut out the bread with the back of the mold, spread PB&J but not up to the edges, fold over the mold and it seals in the PB&J. Then freeze them in airtight containers & you've got enough for a month of sandwiches (use within about 6 weeks for best taste). Add raisins, chopped apples (sprinkle with lemon to keep from browning), celery bits, and anything else that's good in a PB&J. You can also do this with cream cheese & pesto (about 1/3 pesto to 2/3 cream cheese) spread thinly and add ham, turkey, or roast beef slices - use the press and viole! More sandwiches in the freezer ready to toss in on days you don't have time or inspirations.
I can't remember what the mold is darn it! They're for Mexican turn overs I think...here they are! Empanada Maker & video on how they're supposed to be used :) http://keykitchen.com/Modern-Kitchen/Empanada-Maker/
Packed lunch inspiration - Page 2
Tuesday 23rd of August 2011
[...] Packed lunch inspiration https://mommymoment.ca/2011/01/ho...ble-lunch.html So cute! [...]
Ruvi
Wednesday 9th of February 2011
Absolutely love all these beautiful lunches!